

You can make your first CapCut video with three clips, a short title, and a little music. In this walkthrough, we’ll make a 15-second property tour. You can follow the same steps for a vlog, an event recap, or any short video you want to share.
This guide is based on CapCut for iPhone, version 19.9.0, as used on November 6, 2026.
Before you open CapCut
Pick three clips from your iPhone’s Photos library. For a property tour, start with the exterior, move into the main room, and end on one feature you want people to remember. Write a short title, such as “A Quick Look Inside,” and decide whether you want music, narration, or both.
How to edit a video from scratch
1. Start a new project
Open CapCut, tap New project, and select your clips in the order you want them to appear. If CapCut asks for access to your photos, allow access to the clips you plan to use. To remove a clip from your selection, tap the white circle with a line through it. Tap Add to open the editor.
2. Trim your clips
The timeline is the row of clips below the video preview. The playhead is the white vertical line that marks the moment you’re viewing.
Tap a clip in the timeline. White trim handles appear at both ends. Drag the left handle inward to remove the beginning or the right handle inward to remove the end. For a property tour, you might trim away the moment you lift the phone before a shot. Tap Play to see how the clips flow together.
3. Add music and balance the sound
Tap Add audio → Sounds. Tap a track to preview it, then tap + to add it. Play the video with the music to see how they sound together.
If the original sound from a clip is distracting, tap the video clip, choose Volume, and lower it. If your timeline shows a Mute button beside the clips, you can use it to silence their original sound at once.
If you’re promoting a property or business, choose music cleared for commercial use on every platform where you plan to post. Under CapCut’s U.S. terms, its commercial sounds are licensed for use on CapCut, TikTok, and TikTok for Business. Posting a video with those tracks on Instagram, YouTube, or your website requires separate permission. For templates and other CapCut assets, look for the Commercial Use label and check the applicable terms. CapCut Materials License Agreement
4. Trim the music and fade it out
If the music extends past the video, move the playhead to the end of your last video clip. Select the music track, tap Split, then select and delete the extra piece. Tap the remaining music, choose Fade, and adjust the fade-out slider so the music ends gradually. You can also add a short fade-in if the opening feels abrupt.
5. Add a title or sticker
Tap Text → Add Text and type your title. Drag it to position it and pinch to resize it. Use Font, Styles, or Effects to change its appearance, or Animations to add movement. Tap the checkmark to confirm. Then drag the white handles on the text layer in the timeline to choose when it appears and disappears.
To add a sticker, tap Stickers, search by keyword, and tap the one you want. Drag or pinch to position and resize it, then tap the checkmark. Set its timing with the handles on the sticker layer.
6. Record a voiceover
Move the playhead to where you want the narration to begin. Tap Audio → Voiceover, then tap the microphone. Allow microphone access if prompted. Record the whole voiceover at once or work in short sections. Tap the checkmark to add the recording. Play it back and lower the music track’s Volume if any words are hard to hear.
7. Try a transition or a speed change
These tools are optional. Try them after you’re happy with the order and timing of your clips.
Add a transition. Tap the small white square between two clips, choose a transition, and use the slider to set its duration. If you’re using the free version, choose one without a Pro label. Replay the two clips together to see how it feels.
Change the speed of a whole clip. Tap the clip and choose Speed → Normal. Move the slider to make the entire clip faster or slower, then tap the checkmark.
Change the speed of part of a clip. Tap Speed → Curve → Custom. Use the Beat points to shape the speed change. Raise a point where you want the clip to speed up and leave the surrounding points at 1× where you want normal speed. This is called a speed ramp. Tap Play to preview it.
8. Export and check your video
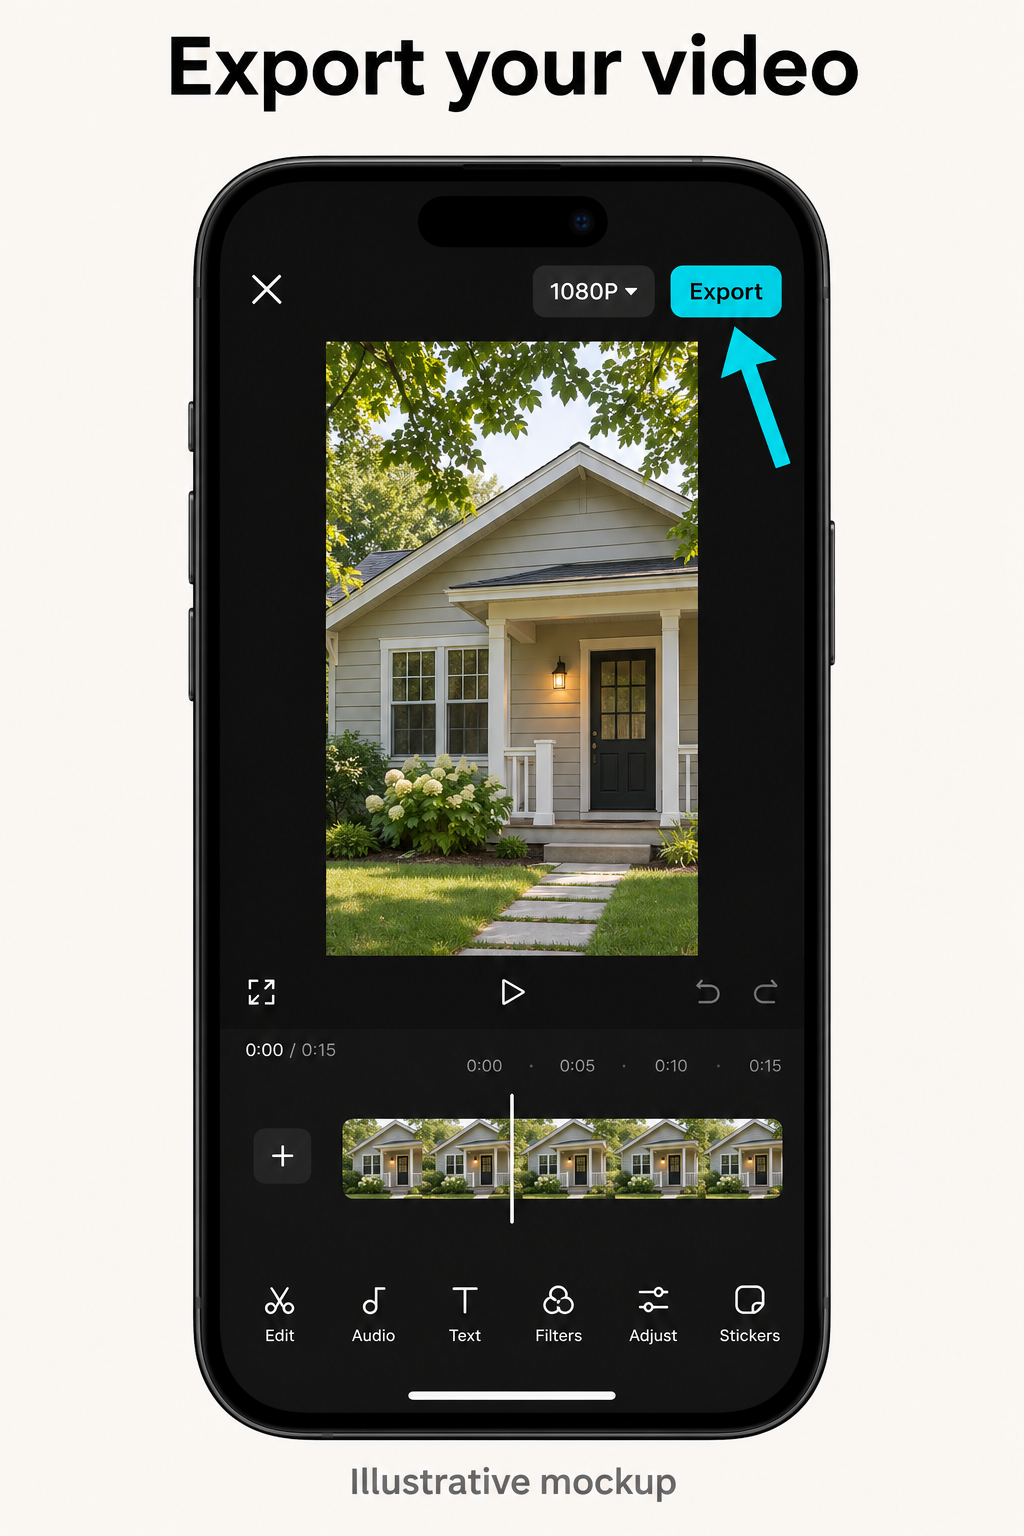
Play the video from start to finish. Check that the title stays up long enough to read, the narration is clear, and the music ends where you want it to. In the top-right corner, look for the resolution label beside Export. Choose 1080p if available, then tap Export. Open the finished video in your iPhone’s Photos app and play it before sharing. CapCut mobile export guide
How to make a video with a CapCut template
A template gives you a starting layout and timing. You fill it with your clips and replace any sample text.
Choose a template. On the CapCut home screen, tap Templates. Search for real estate, vlogs, or another topic. Preview one you like, then tap Use template.
Add your clips. Select your clips in the order you want them to appear. To remove a selection, tap the white circle with a line through it. Tap Next.
Replace the sample text. Tap the text in the preview to open the editor. Select a text item from the bottom menu, tap Edit, enter your own words, and tap the checkmark. Repeat for every line.
Export the finished video. Watch the full preview, then tap Export in the top-right corner. Save it to your device, or choose Save and share to TikTok if the option appears and you’re ready to post.
Quick fixes before you post
The music drowns out the narration. Select the music track and lower the volume until you can hear every word.
The title disappears too quickly. Drag the right edge of the text layer to keep it on screen longer. Play it back and see if you can read it comfortably.
A transition feels slow. Shorten it with the slider and replay the cut.
The template still shows sample text. Watch the whole preview and check each title. For a listing video, double-check the price, location, and property details.
Try it yourself — Make a 15-second property tour
Put your three clips in order: exterior, main room, and standout feature. Trim them to about 15 seconds total. Add one title and a track cleared for wherever you plan to post. Fade the music out at the end, then export the video and watch it in Photos.